Walkaround Checks- Driver App Users
Wednesday 13 September 2023
Registering and logging into the app
To access the walkaround checks, you must be registered to the Vision Driver App. To register for the app, you can download the Vision Driver app via the play/app store (Android/IOS) and register with the following details:
- Username (your email address)
- Password (create your own password)
- Activation code (supplied by your manager)
- Licence number (to identify your data on the system)
Note: Your login will give you access to the App and PC version (Driver Kiosk).
Once registered, your manager will need to approve your registration. Once approved, you will be able to log into the app using the details you used to register with.
Completing walkaround checks
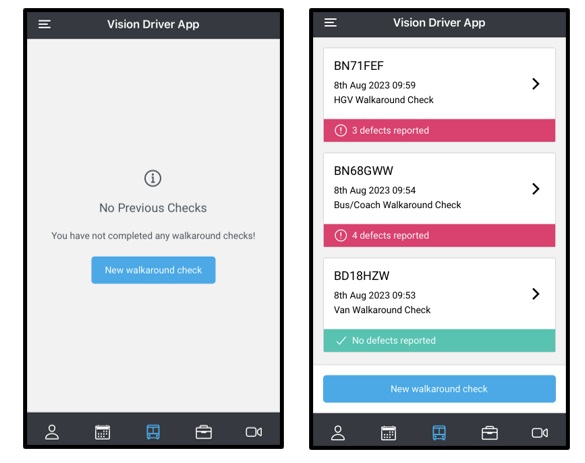
Once you have been able to log into the app to you need to select the middle (HGV front view) icon. Here you will see a list of all previous walkaround checks, however, if this is the first time you are using the app to record a walkaround check, this page will be blank. To complete a new walkaround check, select the ‘new walkaround check’ button.
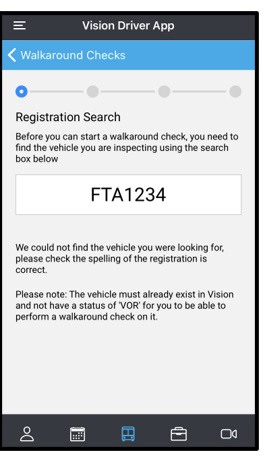
This will then allow for you to search for your vehicle registration. Note: if your vehicle is not set up within Vision or the vehicle is set as VOR, you will not be able to conduct a walkaround check using the app until this vehicle is put on Vision – please speak to your manager if this is the case.
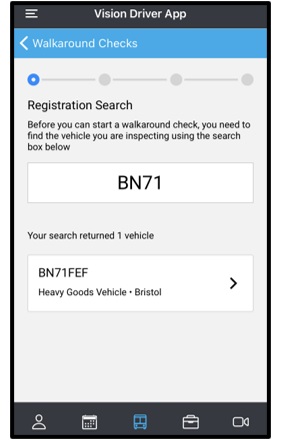
If the vehicle is available on the account, or if you have searched for part of a registration, then all vehicles will be listed. You will also see that the type of vehicle and the Vision location is also listed.
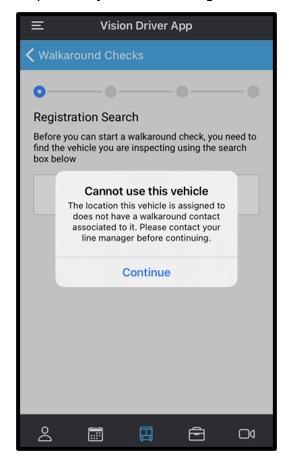
Select the vehicle you want to complete the check on, if you see the below error message, this means that the check cannot be completed due to a walkaround check contact not being set up against the vehicle location. This must be set up prior to completing the check, so please speak to your line manager.
If you select the vehicle you want to complete the check on, and it opens up a screen similar to the below, then you will be able to see the checks which are required to be populated for the type of vehicle selected.
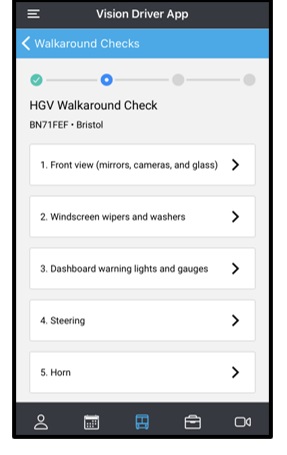
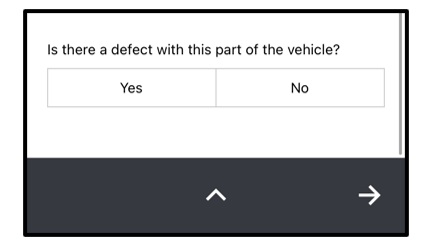
To complete the sections, click into section 1 and move through the sections completing yes or no to the ‘Is there a defect with this part of the vehicle?’ question. If no defects are found within that section, then you can either swipe left to move to the next section or select the arrow to move forward.
If you have a section which has a defect, you must enter a comment which states what the defect is. You can also upload up to 3 photos of the defects, to add a photo select the camera icon below your comment box and take a photo with your camera, you can then choose to accept the image or take the photo again. You will then see the image listed below your comment box on your section screen.
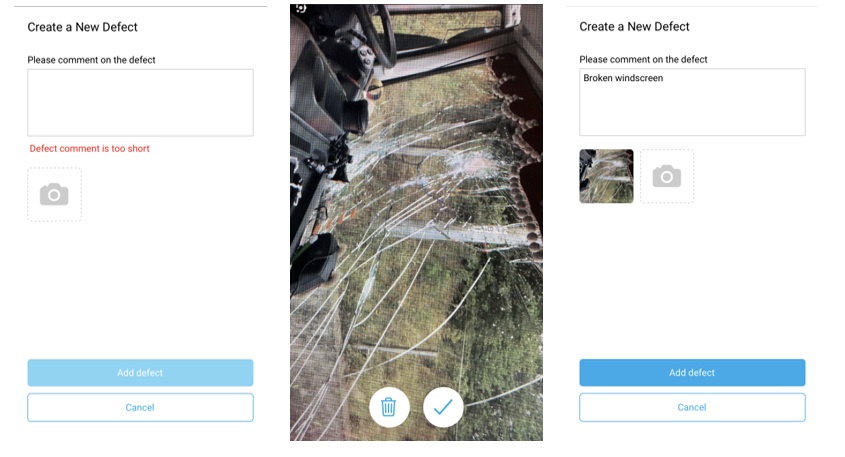
Once you are happy with your comment and your photos (if applicable), then select the ‘add defect’ button, and this will take you back into the section you were completing.
If you have another defect that you want to add to this section, select the ‘add another defect’ button and repeat the above steps with a comment and photos
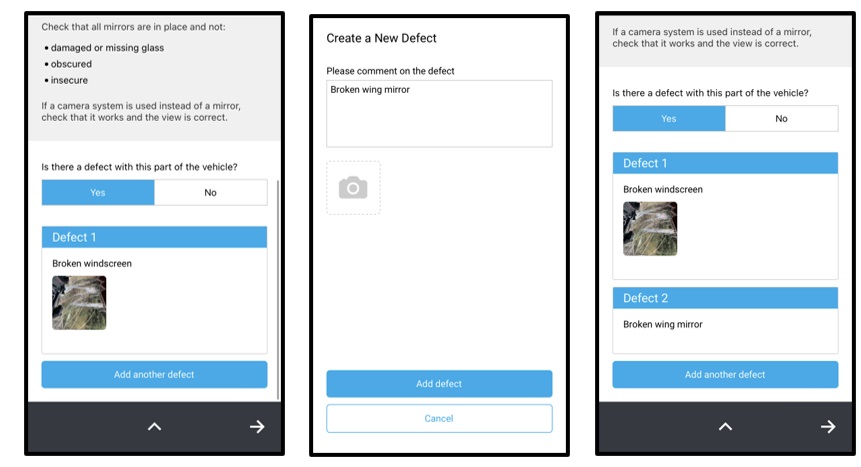
Once all defects have been added to a section, you can move forward into the next section by either swiping left on the screen or using the forward arrow.
Alternatively, you can complete each section in your own order and return back to the landing page after each section has been completed by pressing the back ‘^’ icon.
If you choose to come out of the section, rather than moving forward, you will see the section will be marked with a tick if you have selected no defects in that section, or an exclamation point and number of photos attached to the section if you have selected that there are defects within that section.
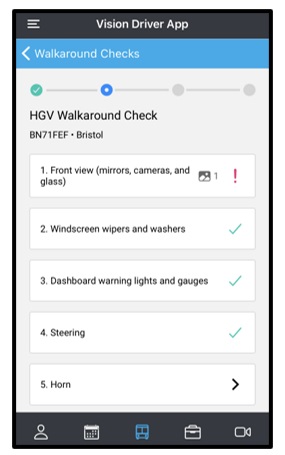
Once you have completed all of the sections, you can then press ‘next’ and move into the walkaround check driver declaration sign off page. Note: you can only submit the walkaround check if the tick box has been completed.
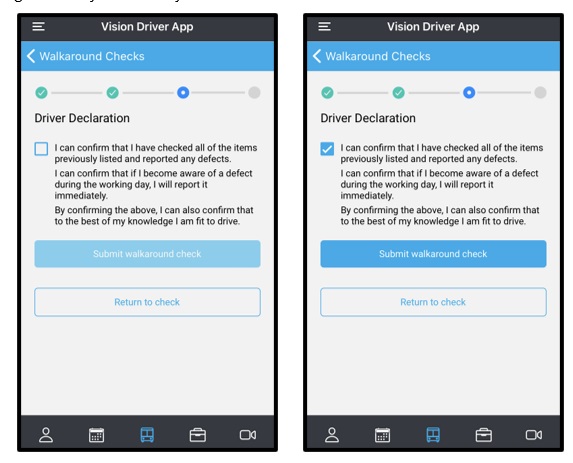
Once you have completed the driver declaration sign off, your walkaround check will be submitted to Vision and your photos will be submitted alongside your check.
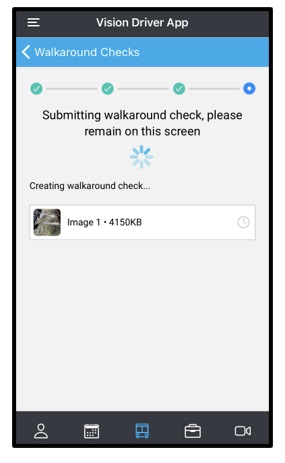
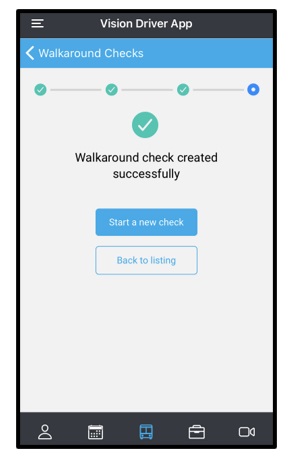
Once your walkaround check has been created, you can either start a new check, or you can return back to the walkaround checks listing page, where you will be able to see all previous walkaround checks.
Accessing previously completed walkaround checks
When logged into the app to you need to select the middle (HGV front view) icon. Here you will see a list of all previous walkaround checks that you have completed.
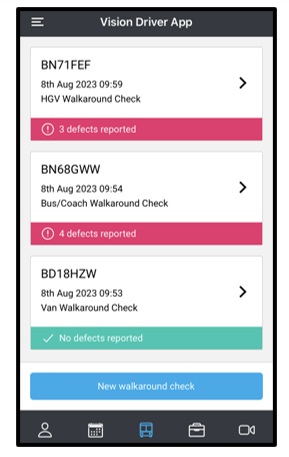
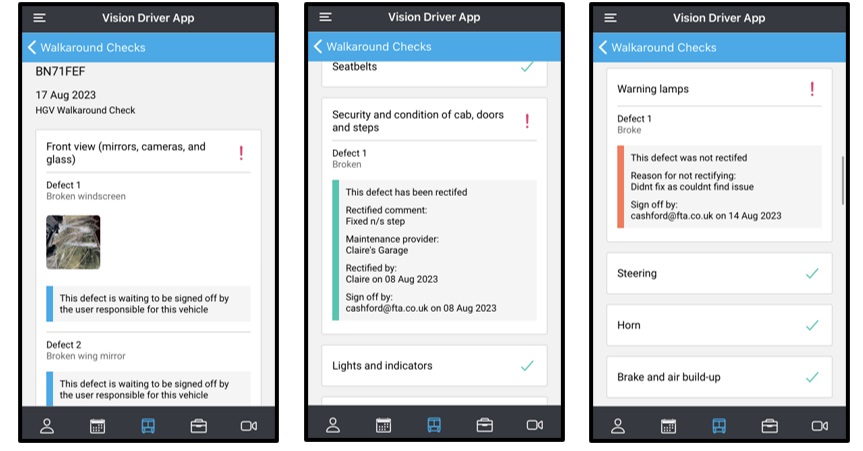
You can select a check to view, and this will load up a non-editable version of the new walkaround check sections.
If you are viewing a walkaround check that does not have any defects, then you will see the sections with a tick against them.
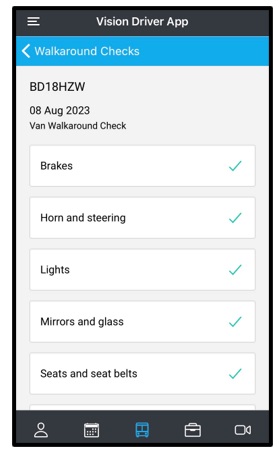
If you are viewing a walkaround check that does have defects, you will be able to see updates on the sign off status of these defects in 3 different ways. These are pending sign off, defect rectified with sign off information and defect not rectified with sign off information.
