User Management in Vision
Thursday 23 March 2023
In the users’ section of Self Admin, you can manage users as well as configuring access levels.
To access the user management section of Self Admin, you need to hover over the Vision Administration cog on the left-hand side of your screen, then select ‘Manage Users’:

User Management
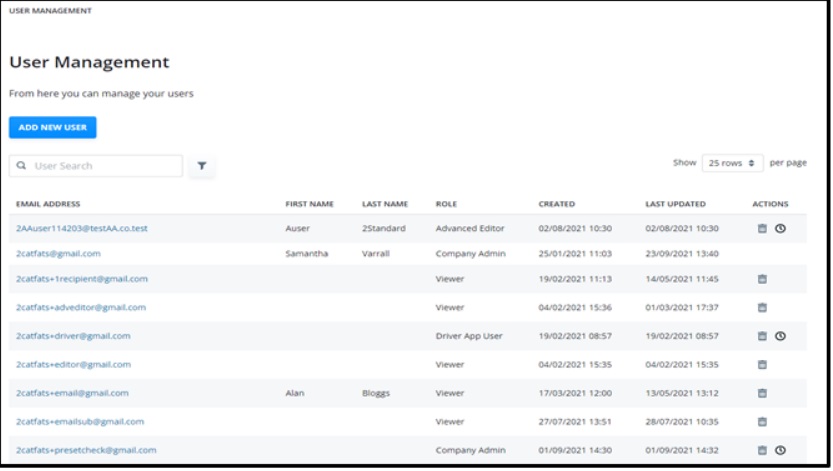
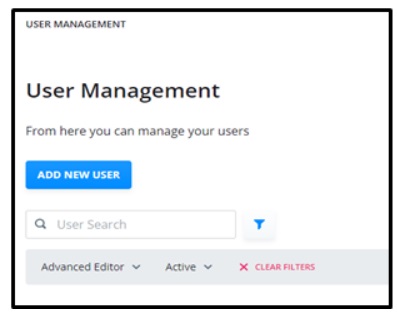
In this section you can add new users and manage existing users on the account. This page will show you a summary of the users, what role they have and when they last logged in, as well as being able to filter the view.
Creating New Users
To add a new user, you need to select the ‘add new user’ button:
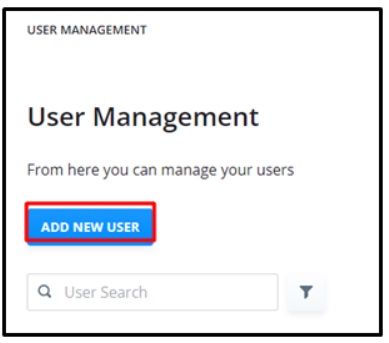
You will need to enter in the email address, first name and last name of the user. Once this information has been entered, press ‘next’:
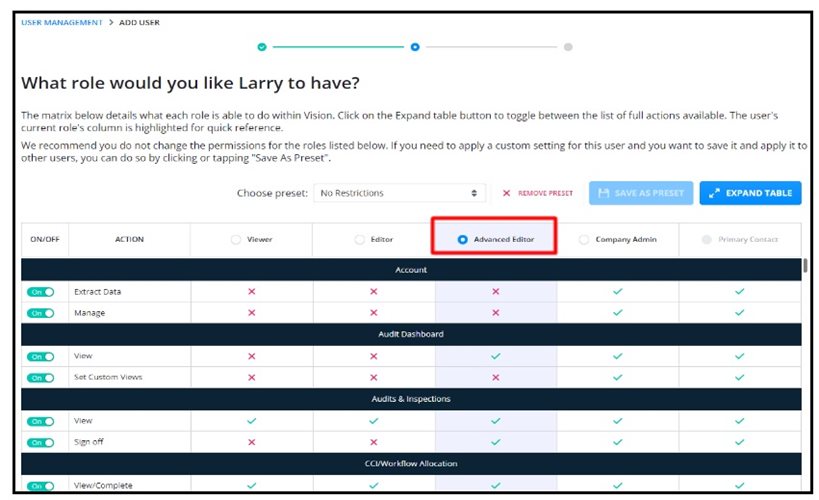
 Select next and pick one of the following user roles:
Company admin: This is the most powerful role. Users allocated to Company Admin will be able to access all areas in Vision. They will be able to manage account features found in Vision admin such as Performance, Debrief and Alert settings. We recommend that this role is only allocated to those people in your organisation that you would describe as ‘Super Users’.
Advanced Editor: We recommend this role is allocated to those users that regularly use Vision to update drivers but also have the responsibility to carry out driver debriefs. They will only have access to Vision Admin to create Manual Entry Templates and Shift Pre Plans. The Advanced Editor role would be typically allocated to someone who is a transport manager or team leader or someone who uses information from the various Dashboards available on Vision.
Editor: We recommend this role is allocated to administrative colleagues who have responsibility for monitoring information and ensuring that assets and drivers are allocated to the correct locations. Users with this role have no access to features found in Vision Admin. The editor role might be allocated to someone like a transport administrator.
Viewer: This role would be allocated to someone who only interacts with Vision occasionally, for example someone who organises and views inspections.
In this example we have given the user the Advanced Editor role:
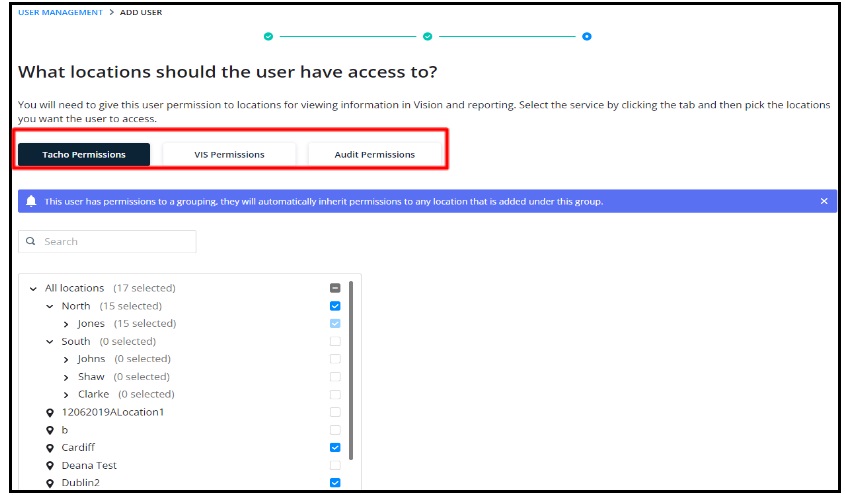
 Once you have picked a role select ‘Next’, you then need to select the location or locations that you wish the user to see. By default, you will see all Tacho Permissions, if you need to select VIS or Audit permissions then select the tab and then choose the required locations.
Once all then required locations have been selected, select the ‘Finish’ button. You can then choose to add another new user or return to the user management page using the blue buttons:
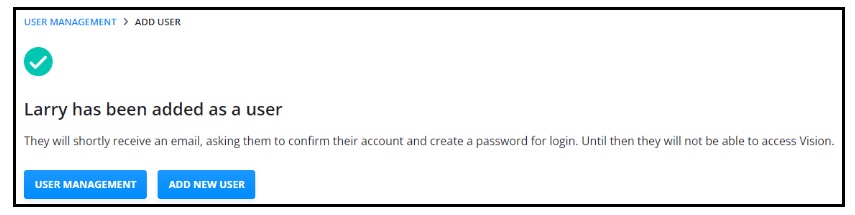
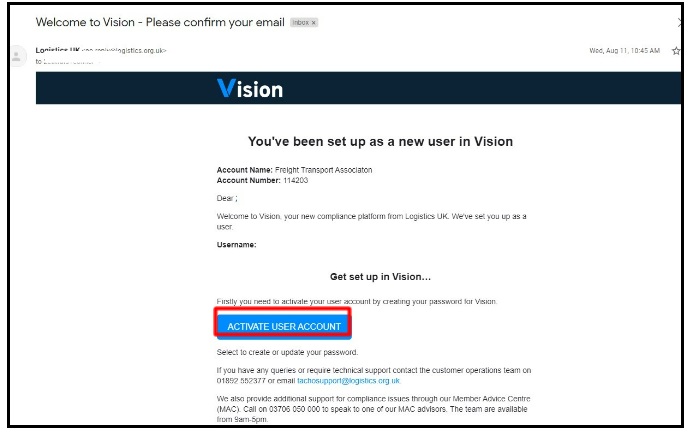
Once a user has been created, they will automatically receive an email requesting that they activate their account and create a password.
Managing Users
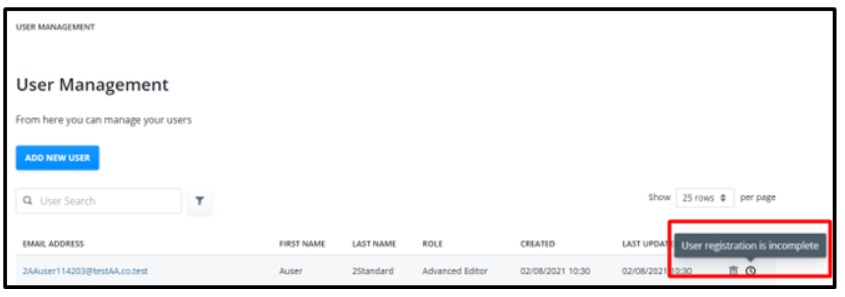
To manage or update existing users, you can search for a user by typing their email details into the search box or you can use the filter by choosing a user role or user status:
Symbols on the user management page against a user highlight if they have not completed the registration process. If this is the case, that user will not be able to access Vision.
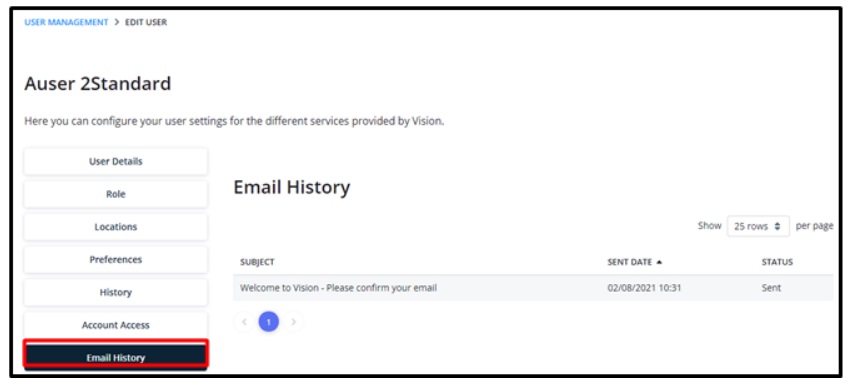
To check that the user has received a ‘Welcome to Vision’ email select the highlighted username, and select ‘Email history’
To edit a user and their permissions search the user and select their highlighted email address:
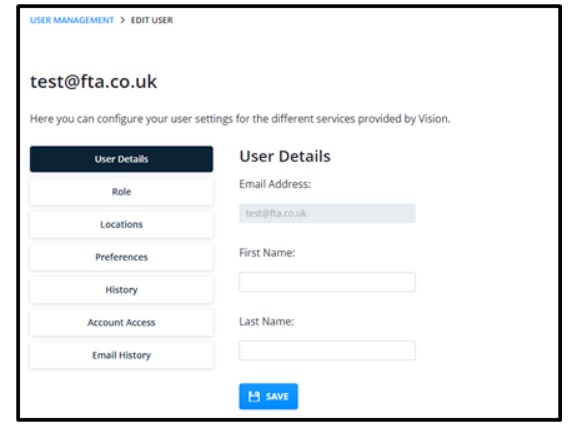
User Details’ - allows you to update the drivers name
‘Role’ - allows you to make changes to their user role
‘Locations’ - allows you to change the locations they have permissions to see
‘Preferences’ - allows you to set the user as an email recipient for Audit reports or Vehicle inspection reports if your company takes either of these Logistics UK services.
‘History’ - allows you to track any changes made to that User.
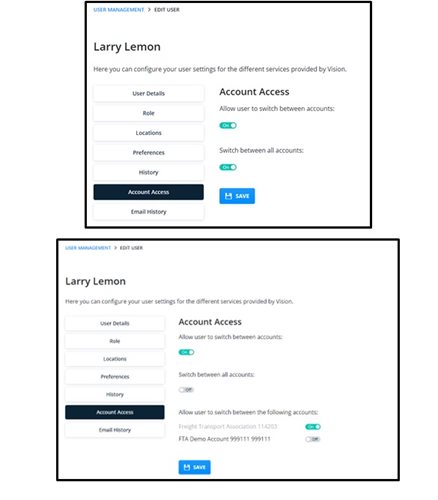
‘Account Access’ - Account access is only used where the account is linked to other accounts. It is there to allow a user swap between other related accounts. The default is set to swap between all accounts, but if you turn it off you can then select which accounts you would like to swap between: