













Vision Help Articles
Vision Import Page Update
We have updated our import pages to make uploading quicker and simpler for both Tacho Files and bulk imports.
Initially only Tacho files and Asset uploads will be affected.
How to access the page
The upload feature has been split into two sections:
Bulk Imports including
- Assets
- Employees
- Training
- Shift pre plan
Tacho Imports including:
- Driver Card files
- Vehicle Unit Files
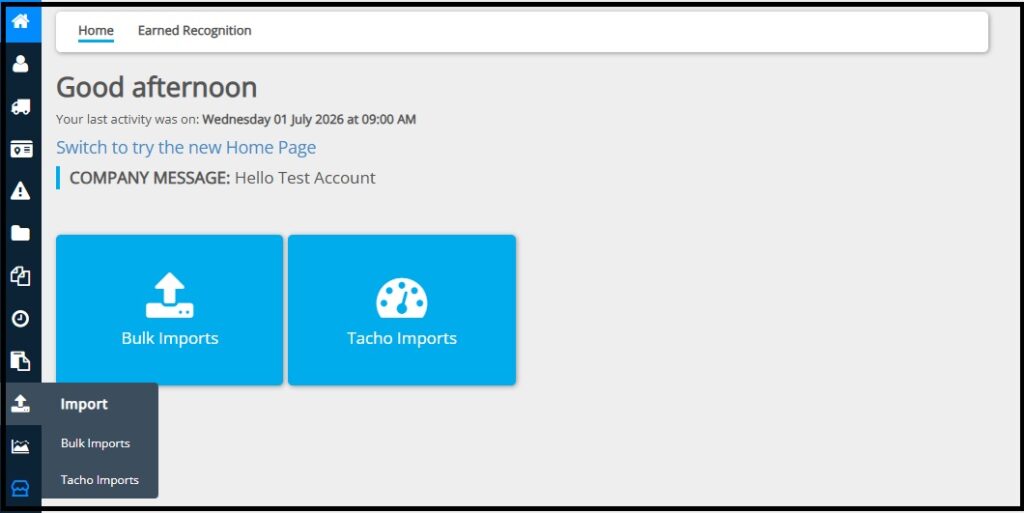
Bulk Imports
Both employee and asset bulk imnports are available. You will be directed to the old pages if you want to import any of the other options. Please note, only Excel spreadsheets can be uploaded
Importing Assets or Employees
Select Bulk Import and select Assets and then select the excel sheet you would like to import. The benefit of the new import process is that you can import any excel spread sheet relating to your assets and map the relevant columns
Select New Import and from the dropdown list select asset or employee:
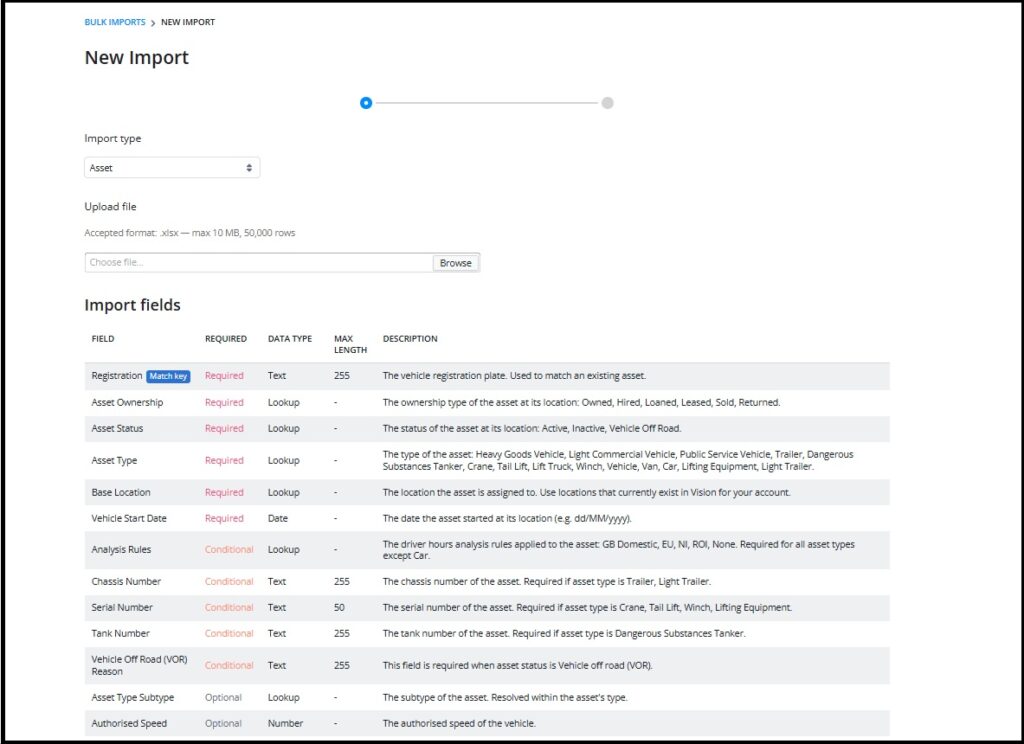
The front page will highlight those fields that are necessary or those that are optional when uploading a new document
Select the Excel spreadsheet containing the asset types that you want to import:
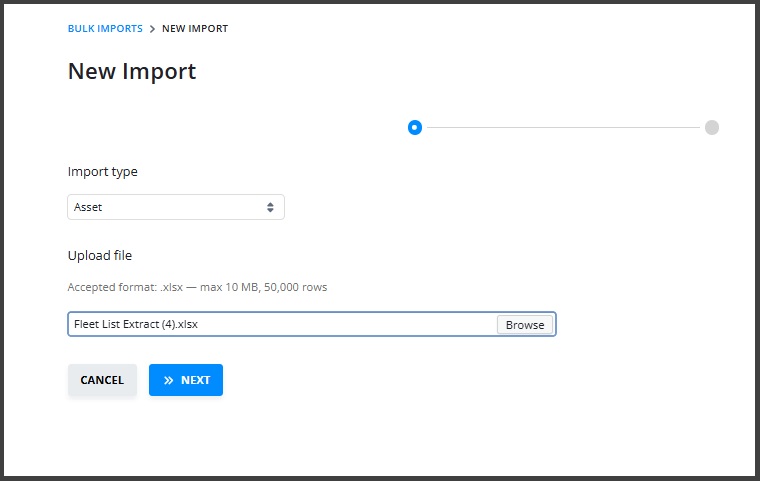
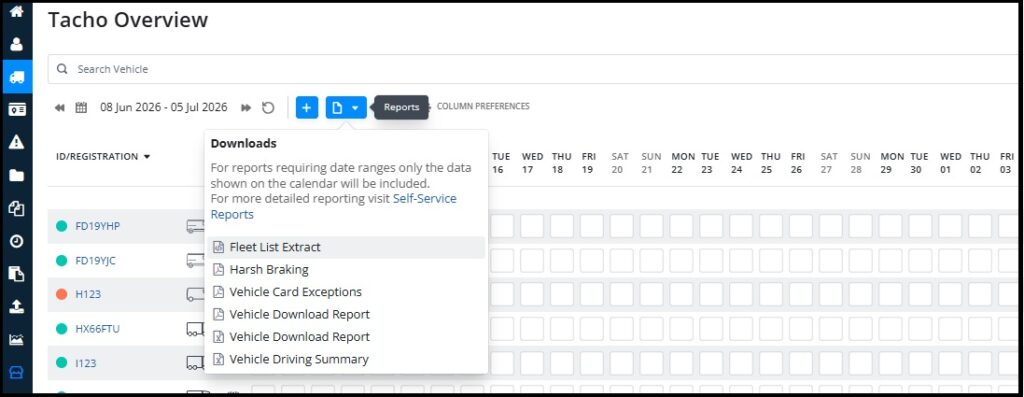
Note- If you just want to update information on assets that already exist on Vision you can run the Fleet Extract or Driver Extract report from the main pages save it as an Excel spread sheet and then import it with your changes:
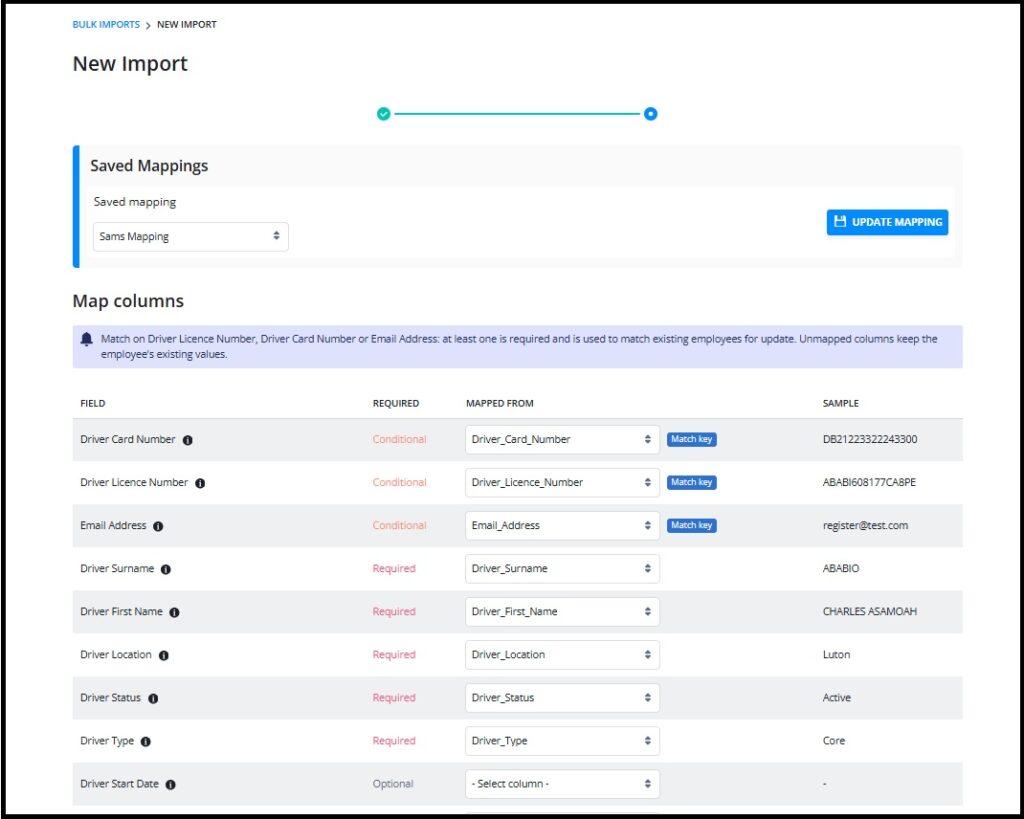
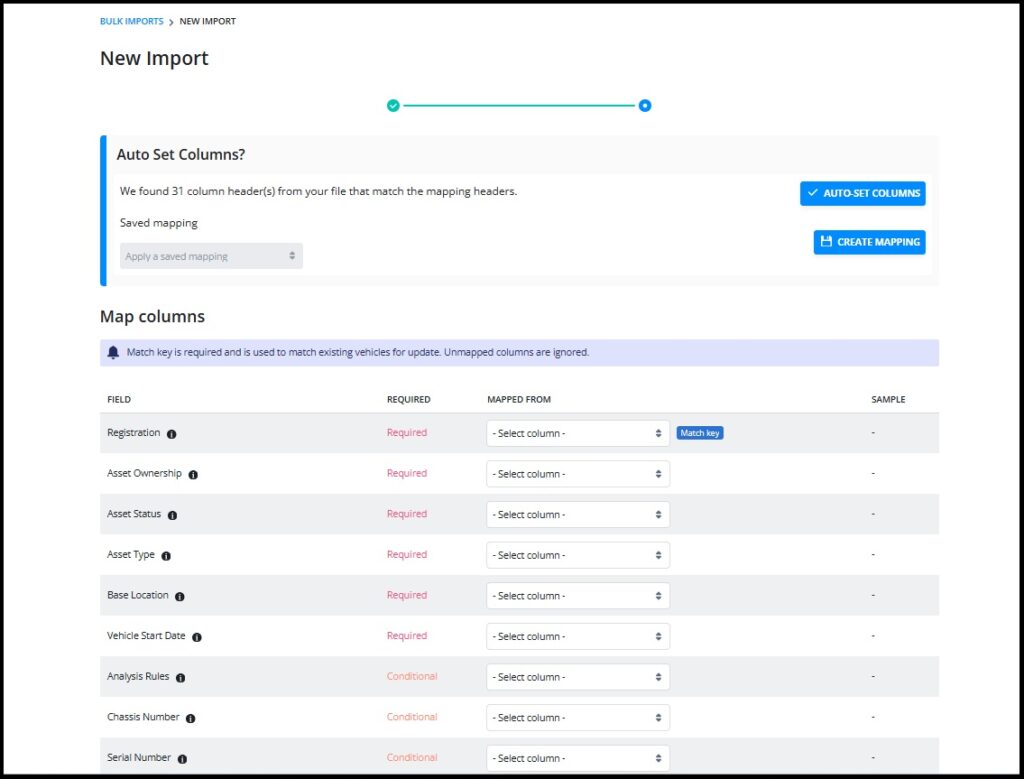
Once you have uploaded your spreadsheet you will be taken to the mapping screen. If there are similar columns in your spreadsheet as are required to upload successfully, you will be offered the opportunity to auto set these by clicking the blue “Auto Set Columns” button at the top of the page:
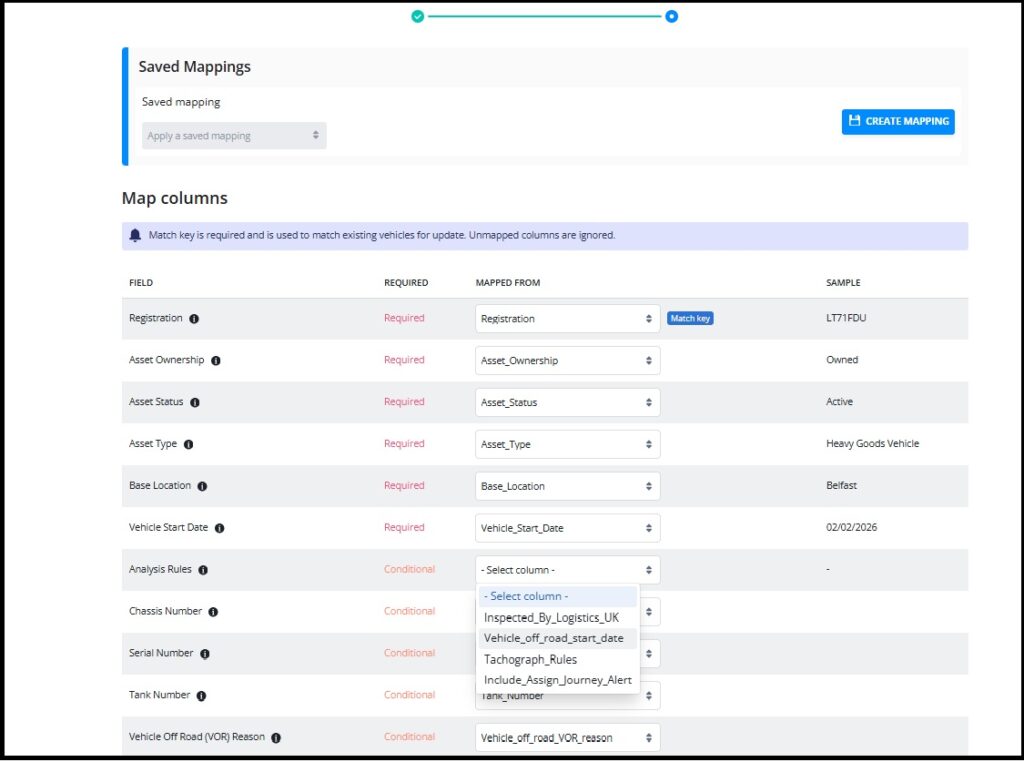
For those rows not automatically set, pick the most appropriate option from the dropdown list:
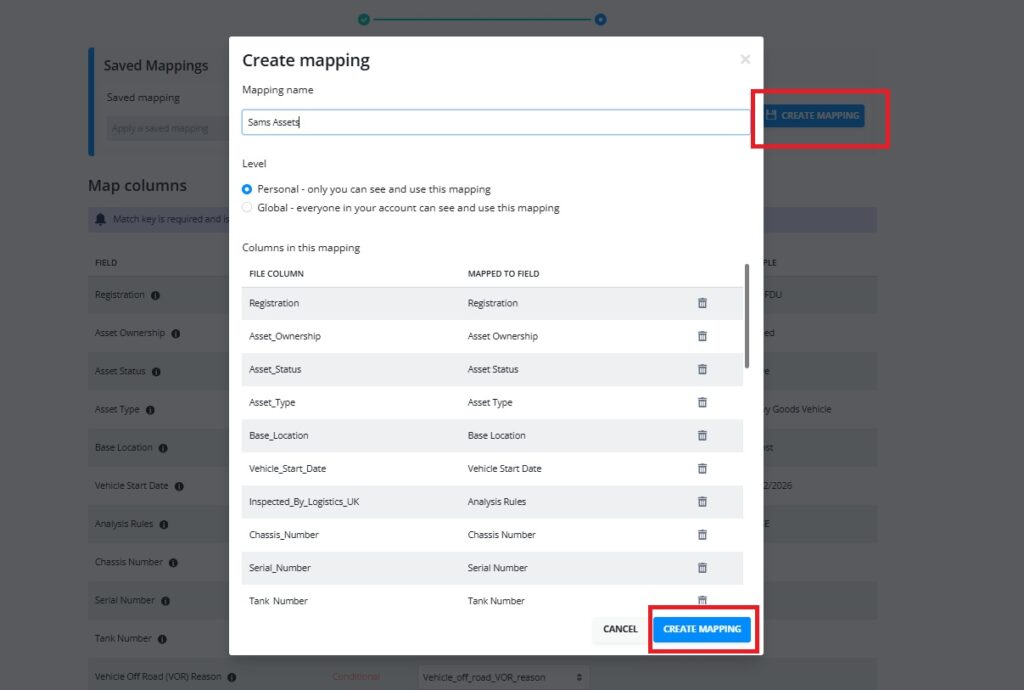
If you are likely to upload the same document to add assets in the future, once all the necessary columns have been updated you can then save the mapping:
TIP- Before uploading your spreadsheet, make sure that the base location for the assets match the locations you have set on Vision
Once mapping is completed scroll to the bottom of the screen and select “Start Import”:

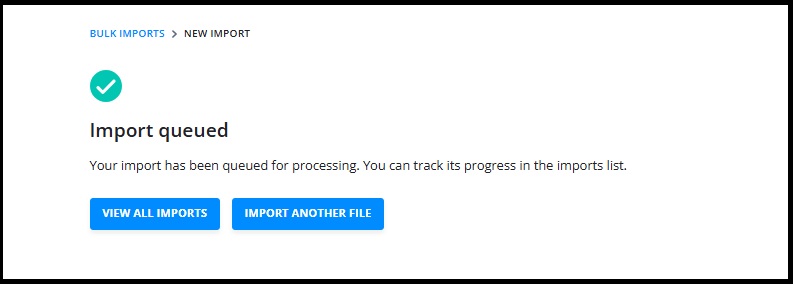
Clicking “View all imports” allows you to see the progress:
If there are errors, click the file name, and then download the error file:
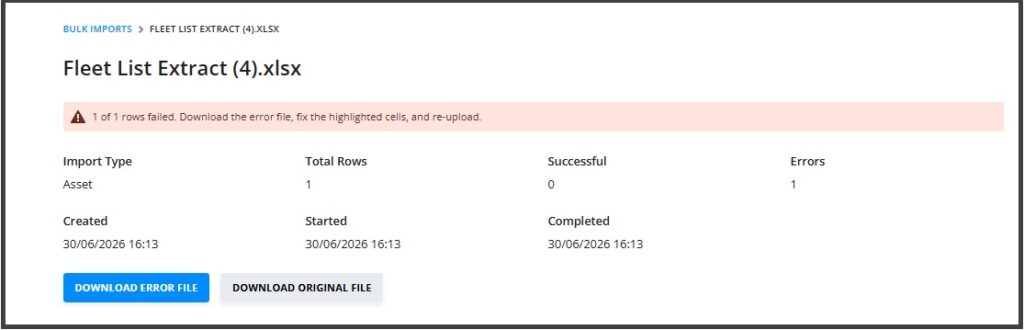
The problem area will be highlighted in red:

Make the change and save the file and reimport. The errors will only relate to the rows with a problem, all rows that have no errors will upload.
Tacho Imports
Although there is a different layout, the Tacho Imports page works in a similar way to the old page:
Select Tacho Imports from the menu and select an upload location from the menu list:
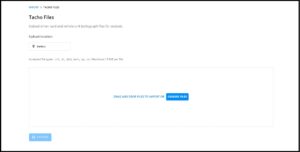
Then select the card or VU files you wish to upload by importing or dragging and dropping them into the screen. The files will appear below the box giving you full details of the asset or driver the upload location and the last known activity date on the file:
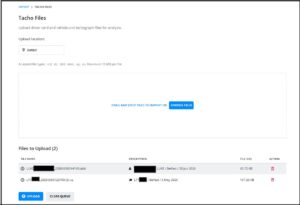
Then simply click upload. A successful upload will be marked by a green tick:
More Vision Help Articles Articles



Related Pages
Check out more news and media
Discover More

Become a Member
Our membership packages provide you with the tools to keep your operation safe, efficient and compliant.
Learn more

Press Releases
Latest updates, insights, and expert commentary shaping the future of logistics, transport, and supply chains across the UK.
Learn more

Services
Discover the full range of services from Logistics UK, designed to keep your operation safe, efficient, and compliant.
Services

Events
Discover upcoming Logistics UK events designed to bring industry leaders, policymakers, and businesses together.
Events
Stay Ahead. Stay Compliant. Stay Connected.
Join thousands of logistics professionals using Logistics UK to navigate industry change with confidence.
Join Us